


Introduction
If you’re a gamer who loves the feel, layout, and comfort of the Nintendo Switch Pro Controller and wants to bring that same experience to your PC gaming setup, you’re in luck. This controller isn’t just limited to Nintendo consoles, it’s also surprisingly versatile and highly compatible with both desktop and laptop computers.
Whether diving into the latest AAA titles on Steam, navigating through indie favorites, or using emulators to relive retro classics, connecting your Switch Pro Controller to a PC is easier than you might imagine. This in-depth guide will how to connect switch pro controller to pc, walk you through all the possible connection methods, including both wired and wireless setups, and offer helpful tips for customization, troubleshooting, and performance optimization.
Here’s a simple and informative table that outlines the different methods for connecting a Switch Pro Controller to a PC:
| Connection Method | Steps to Connect | Requirements | Supports Steam? | Notes |
|---|---|---|---|---|
| USB (Wired) | 1. Plug USB-C cable into controller and PC. 2. Windows should auto-detect and install drivers. | USB-C to USB-A or USB-C cable | ✅ Yes | Most reliable connection with minimal latency. |
| Bluetooth (Wireless) | 1. Hold sync button until lights flash. 2. On PC, go to Settings > Devices > Bluetooth & other devices. 3. Click Add Bluetooth device and select “Pro Controller.” | PC with Bluetooth support | ✅ Yes | May need to re-pair after sleeping or disconnecting. |
| Steam Setup | 1. Open Steam. 2. Go to Settings > Controller > General Controller Settings. 3. Enable Switch Pro Configuration Support. | Steam client | ✅ Yes | Allows customization, gyro use, and button remapping. |
| Third-Party Tools (Optional) | Use tools like reWASD or DS4Windows to remap buttons or improve compatibility in non-Steam games. | Software installation | ⚠️ Partial | Useful for non-Steam games or advanced settings. |
How To Connect Switch Pro Controller To PC?
To connect a Switch Pro Controller to your PC, you have two main options: via Bluetooth or using a USB-C cable. For a wired connection, simply plug the controller into your PC using a USB-C to USB-A or USB-C to USB-C cable, and it should be recognized automatically by Windows.
For wireless connection, ensure your PC has Bluetooth enabled. Then, press and hold the sync button on the top of the Pro Controller until the indicator lights begin to flash. On your PC, go to Settings > Devices > Bluetooth & other devices, then click Add Bluetooth or other device and select Bluetooth.
Choose the “Pro Controller” from the list of available devices, and your controller will pair and connect. Once connected, you can use it with most PC games, especially those on Steam, which natively supports the Pro Controller.
Option 1: Connecting via USB Cable

Using a wired connection is the simplest and most reliable method, especially for those who want zero input delay and constant power.
What You’ll Need?
- A USB-C to USB-A cable (or USB-C to USB-C if your PC has a compatible port)
- A Windows PC or Mac with at least one available USB port
Step-by-Step Instructions
- Plug one end of the USB cable into the top port of your Switch Pro Controller.
- Connect the other end into your PC’s USB port.
- Your operating system (Windows or macOS) should automatically detect the controller and install any necessary drivers.
- Once recognized, open your preferred game or the Steam client and head to the controller settings section.
- Configure button mapping, stick calibration, and sensitivity to match your gameplay style.
Benefits
- No battery concerns—power is supplied directly from your PC
- Ultra-low latency for competitive and fast-paced gaming
- Plug-and-play with most modern systems
Drawbacks
- You’re tethered to your computer via the cable
- Less convenient for gaming setups that favor wireless freedom
This method is perfect for gamers who prioritize performance, minimal lag, and maximum reliability.
Option 2: Connecting via Bluetooth
If you’re all about flexibility and freedom of movement, connecting wirelessly via Bluetooth is your best bet.
What You’ll Need?
- A PC with built-in Bluetooth or an external USB Bluetooth adapter
- A fully charged Nintendo Switch Pro Controller
Step-by-Step Instructions
- Ensure your controller isn’t connected to your Switch console or any other device.
- Click Add Bluetooth or other device, then select Bluetooth from the list.
- From the list of detected devices, choose Pro Controller.
- Wait for the pairing to finish.
Benefits
- No cables to trip over or clutter your space
- Great for couch gaming or living room setups
- Pairs with multiple devices easily
Drawbacks
- Potential input lag, especially in competitive games
- Battery needs to be charged in advance
- May require occasional re-pairing
Bluetooth mode is ideal for casual gaming sessions or setups where aesthetics and freedom are top priorities.
Using the Switch Pro Controller with Steam
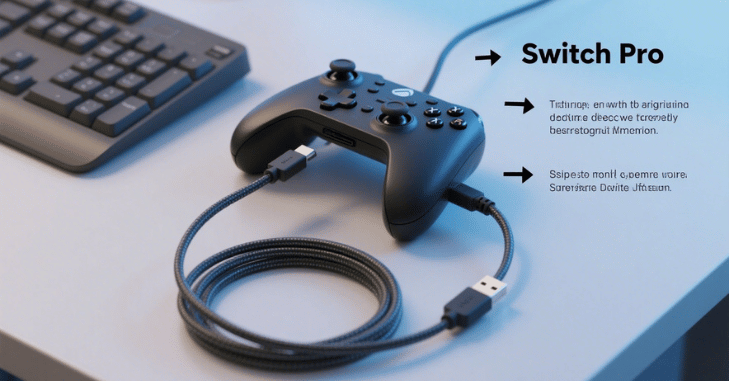
Steam is exceptionally controller-friendly and offers native support for the Switch Pro Controller, making it one of the easiest platforms to use.
To set it up in Steam
- Launch the Steam client on your PC.
- Navigate to Settings > Controller > General Controller Settings.
- Check the box labeled “Nintendo Switch Configuration Support”.
- Once the controller is detected, you can calibrate sticks, remap buttons, and even rename your device.
- For even more control, open Big Picture Mode to adjust per-game controller configurations and create custom layouts.
Steam’s interface makes using your Switch Pro Controller intuitive and tailored to your preferences. It’s a great way to get the most out of your controller without needing third-party tools.
Using the Controller Outside of Steam
While Steam makes things simple, many players also want to use the Pro Controller for non-Steam games or retro emulators. Fortunately, that’s entirely possible with a bit of extra help.
Here’s how to do it?
- Download third-party software like reWASD, DS4Windows, or XInput Wrapper.
- After installation, manually map buttons and triggers to match game-specific control schemes.
Many emulators and game launchers also allow custom input mapping, so be sure to explore each program’s settings for compatibility options.
Troubleshooting Common Issues

- Controller Not Showing Up via Bluetooth? Ensure it’s not currently paired with your Switch.
- Experiencing Lag or Input Delay? Try switching to a USB connection, reducing background Bluetooth interference, or sitting closer to the PC.
- Buttons Not Working in Steam Games? Double-check your Steam controller settings and ensure the configuration support box is ticked.
- Frequent Wireless Disconnects? Update your Bluetooth drivers and make sure the controller’s firmware is up to date.
- Charging Issues with USB Cable? Test another USB port, try a different cable, or make sure your PC provides power through that port.
Having the right drivers and up-to-date firmware can often prevent most connectivity issues before they start.
Conclusion
Bringing the Nintendo Switch Pro Controller into your PC gaming ecosystem offers the perfect blend of comfort, precision, and familiarity. Whether you opt for the straightforward USB wired method or enjoy the flexibility of Bluetooth connectivity, getting your controller set up is quick and painless. Steam’s built-in support ensures a smooth experience with virtually no configuration needed, and third-party software can bridge any compatibility gaps for non-Steam games or emulator use.
With just a few easy steps, you’ll be unlocking a new level of enjoyment from your PC games. So pick your method, power up your controller, and jump into the action with confidence. Your favorite games are about to feel better than ever—thanks to the reliable and ergonomic Switch Pro Controller. Happy gaming!
Want to know about ‘As he continues to grow both on and off the track‘ Check out our ‘Gaming‘ category.
FAQs
Indeed! Just connect the controller to your PC using a USB-C to USB-A (or USB-C) wire. The majority of contemporary operating systems, particularly Windows, ought to identify it automatically.
Then go to Settings > Devices > Bluetooth & other devices on your PC, click Add Bluetooth or other device, select Bluetooth, and choose “Pro Controller” from the list.
Ensure your Bluetooth is turned on, your controller is charged, and you’re using a compatible cable or dongle. Try restarting your PC and resetting the controller by briefly pressing the small reset button near the sync button.
Yes, Steam has native support. Open Steam, go to Settings > Controller > General Controller Settings, and enable Switch Pro Configuration Support.
Vibration support varies by game and platform. Steam supports vibration for the Pro Controller, but other platforms may not.